
Summarize, in about one paragraph, your approach to the scene graph assignment.
How did you structure your code?
What's cool about it? Are there parts you weren't able to complete?
My approach to the scene graph assignment is using the s72-loader to load the scene into the S72 class,
and translate the S72 class data into an intermediate data format that the Tutorial class pipeline (LinesPipeline, ObjectsPipeline) uses.
Currently the intermediate data members and members functions to load and show the scene, are stored in the Tutorial class.
What I think is cool is that I built a pipeline that loads the .s72 format scenes and render them.
And I can get access to low-level graphics API Vulkan, which provides direct control for rendering comparing with OpenGL.
What I weren't able to complete is firstly the extra part of A1x-fast.
I also would like to rearrange my code structure, and define a new class which does the translation of S72 data to the intermediate data.
In this way I could make the Tutorial class structured more clearly and make the overall code length shorter.
Describe your animation and include a screen recording showing it running in real-time:
My animation shows the behavior of an atom. The nucleus consists of protons and neutrons, which I used differnt materials to represent them.
The electrons orbit the nucleus.
Describe how you created your animation.
Since my code reads the .s72 file directly and renders the scene based on the data, for this animation I edited the .s72 file.
For the nucleus I placed eight spheres with different transform. For the electron orbit, it consists of the tilt node and the spin node.
The tilt node determines the orientation of the orbit, and the spin node determines the spinning of the electrons.
One orbit has two electrons, which have opposite positions with each other. The two electron nodes are the child of the spin node.
So when the spin node has rotation, the electrons orbit the nucleus accordingly.
Provide a short overview of how to use your viewer.
The viewer is mostly controlled by the Command-line Arguments.
Open terminal in the "nakluV" folder, run "source ~/VulkanSDK/1.4.335.*/setup-env.sh" and "node Maekfile.js" to compile the source code (Linux/macOS).
Run "bin/main" to run the executable.
Document the command-line arguments that can be used to control your viewer. Include both the command-line arguments required by the assignment statement and any additional arguments you decided to add.
--scene scene.s72 -- required -- load scene from scene.s72--camera name -- optional -- view the scene through the camera name--physical-device name -- optional -- use the physical device whose VkPhysicalDeviceProperties::deviceName matches name--drawing-size w h -- optional -- set the initial size of the drawable part of the window in physical pixels of width w and height h--culling mode -- optional -- sets the culling mode to be none|frustum|bvh--headless -- optional -- if specified, run in headless mode (no windowing system connection), and read frame times and events from standard input. In headless mode, the flag --drawing-size specifies the size of the offscreen canvas that is rendered into --test mode -- optional -- runs the A1-test section, mode can be cpu or gpu
Under cpu mode, the program will automatically loads the test scene for cpu "cpu-bottleneck.s72"
Under gpu mode, the program will load the scene from --scene scene.s72 argument--culled-count number -- optional -- combined with --test cpu argument to set the number of culled objects (outside the camera frustum) in the scene--csv-file-name file_name -- optional -- in A1-test section, the user chosen log file nameDocument the keyboard and mouse controls used to control your viewer when run interactively. Note that the controls below are placeholders not requirements.
The purpose of this section is to get you to think critically about your code by providing evidence sufficient to demonstrate to course staff that it works. These thoughts may also help you improve the code as you work on it in A2 and beyond.
Describe, in a few sentences, how your loading code works.
Reference function and structure names for us to examine.
Tutorial::load_mesh_vertices loads the mesh data file into std::vector< PosNorTanTexVertex > vertices; and the vertice data are transferred to Helpers::AllocatedBuffer object_vertices
Tutorial::build_material_texture loads the material and texture info, creates the indices for them and stores the material data in std::vector< Helpers::AllocatedBuffer > material_params
Tutorial::build_scene_objects traverses the nodes from scene root, calculates the world transform for mesh, light, and camera recursively.
For mesh it will create a new element for std::vector< ObjectInstance > object_instances;, for lights and cameras it will record the data.
Tutorial::load_all_textures loads the texture using the stb_image library, and addes the texture to std::vector< Helpers::AllocatedImage > textures;
(If you have A1-show working, you don't need to provide further evidence here. If you do not, provide some sort of print-outs or other scene statistics to prove that your code can load s72 scenes.)
Describe, in a few sentences, how your display code goes from your internal scene graph representation to triangles being drawn by the GPU.
Provide function and structure names for us to examine.
When I load the mesh vertice data, the data is copied to the vertex buffer Helpers::AllocatedBuffer object_vertices. For each scene object that is a mesh, ObjectVertices in ObjectInstance will record the first index of vertex and vertex count.
For vertex attributes, in PosNorTanTexVertex.cpp there are the four vertex attribute bindings.
For material info, in Tutorial-ObjectsPipeline.cpp I created a new set layout which currently has the albedo vec3 param (binding 0) and the albedo texture sampler (binding 1).
The previous VkDescriptorSetLayout set2_TEXTURE was changed to VkDescriptorSetLayout set2_Material
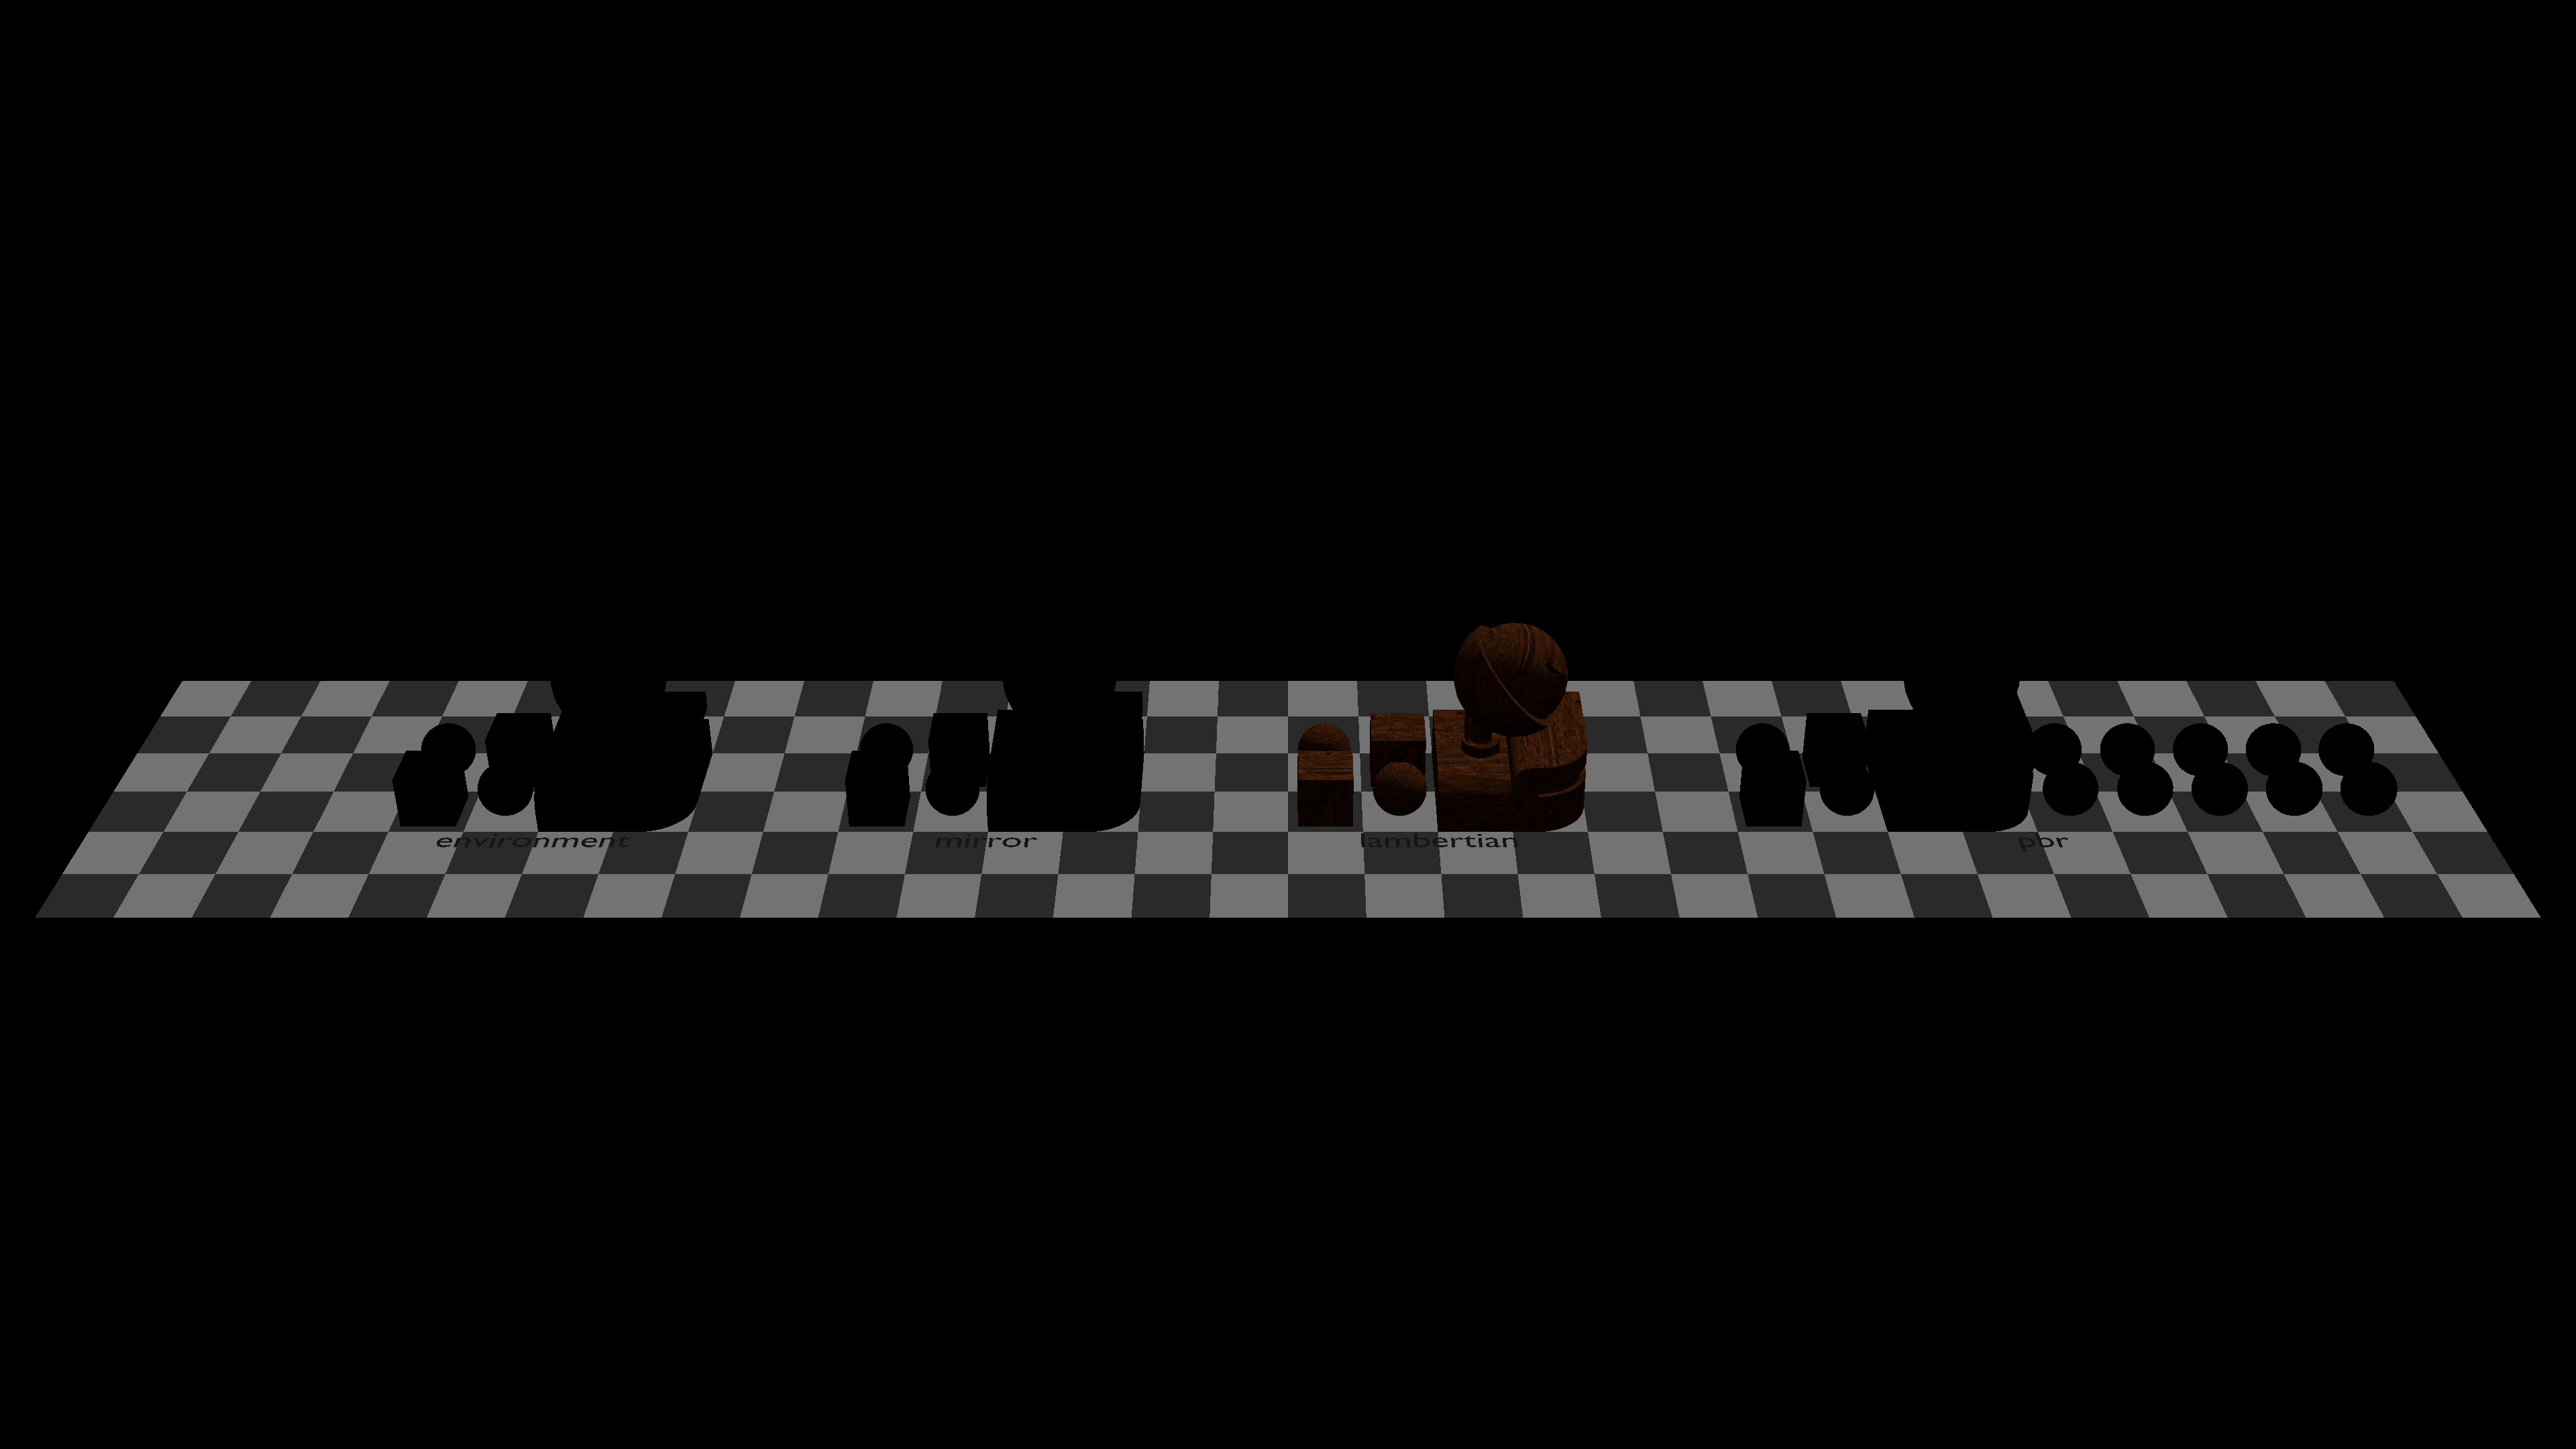
Provide evidence that your code can display s72 scenes. Good evidence: screen shots or movies showing that example scene files load correctly. Choose or generate example scene files sufficient to demonstrate all required features (note that the simplifying assumptions in the assignment mean you do not need to completely implement s72).
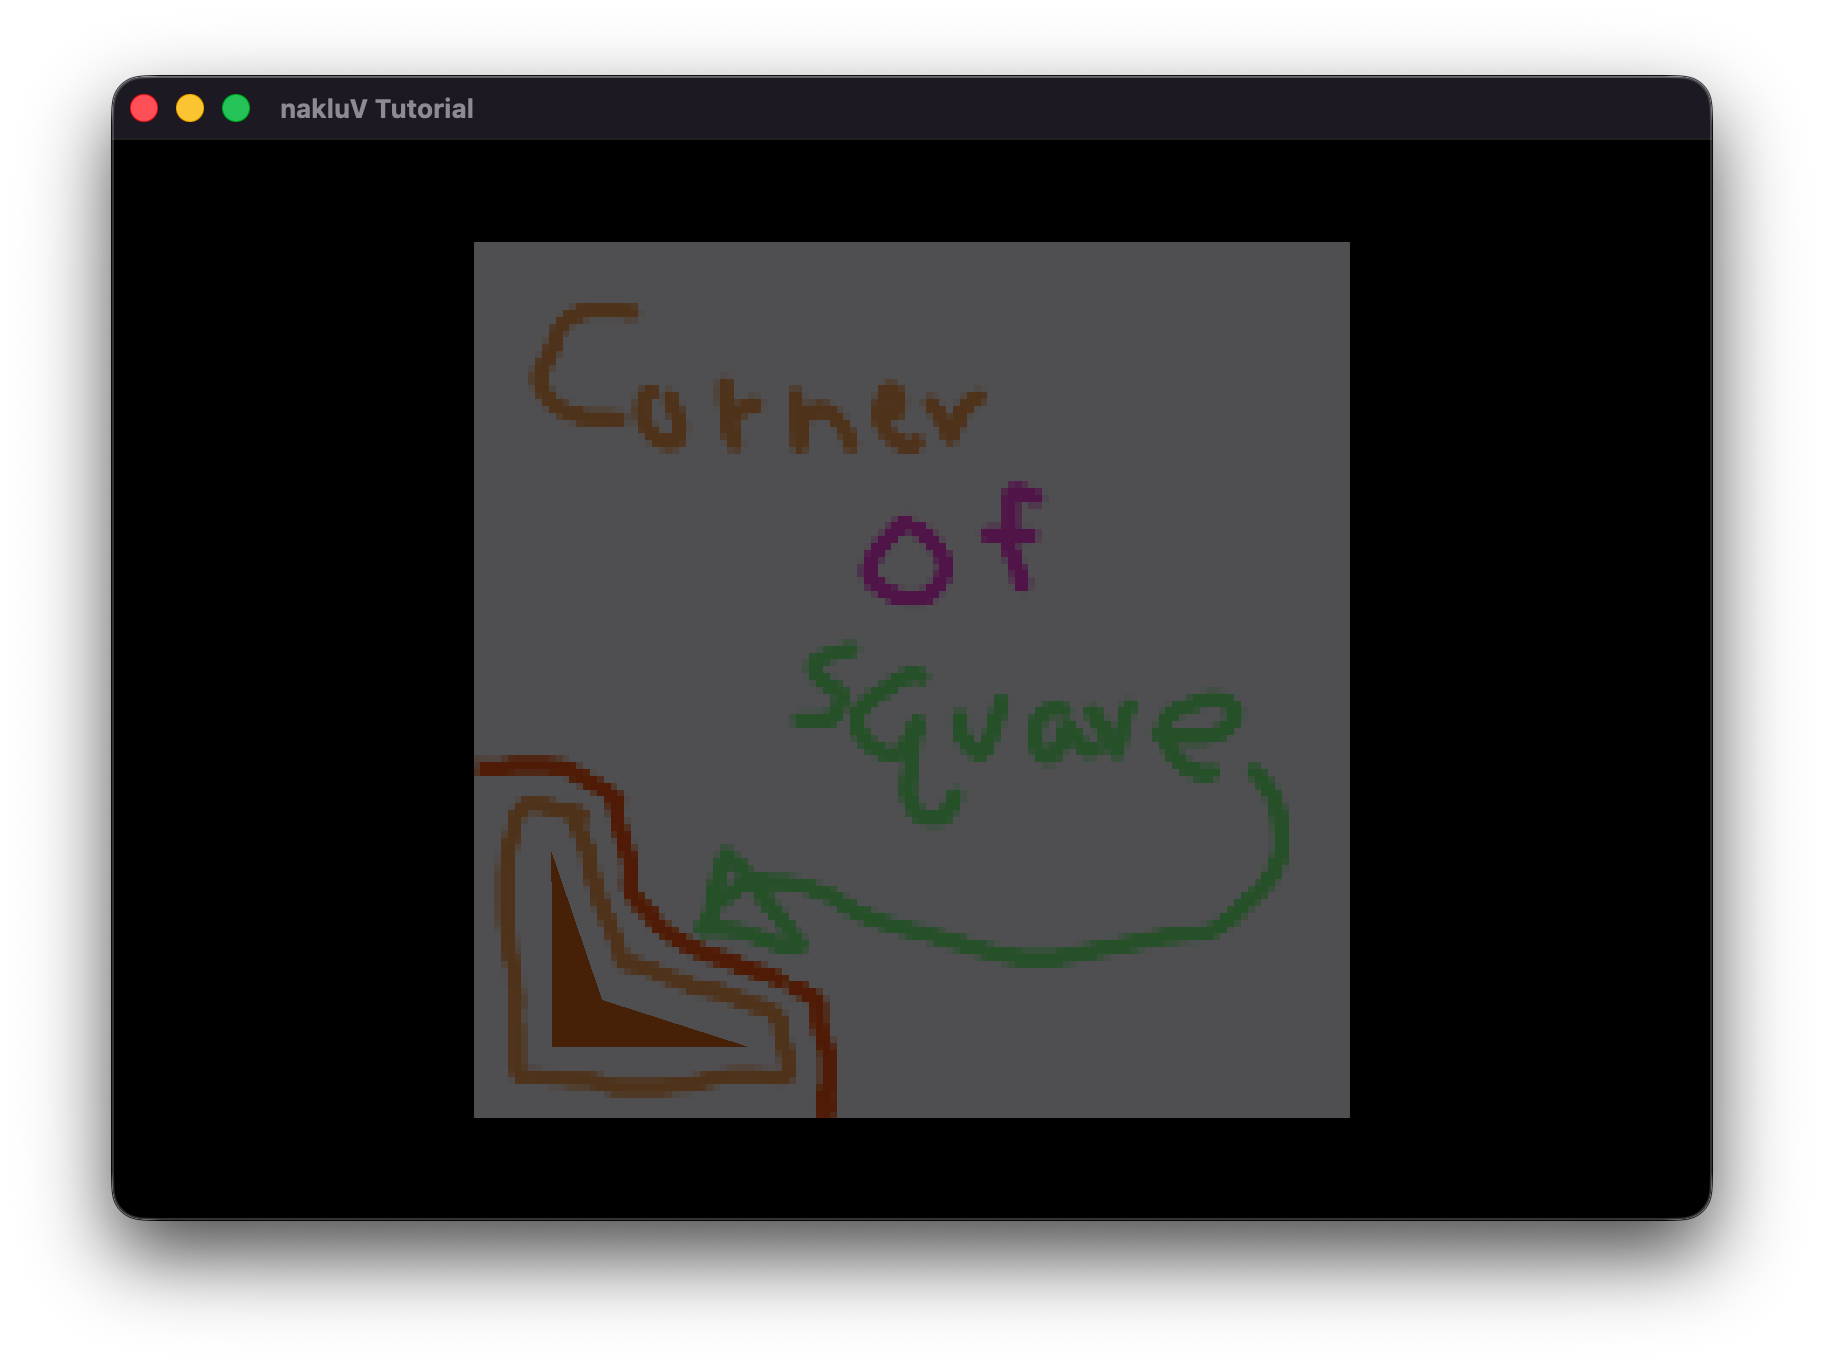
Spend some time thinking about corner cases that the provided examples may not test. If you develop a test case for these, include the s72 and b72 files with your report as well.
Describe how your code handles camera handling and switching.
In Tutorial::on_input the code detects if TAB is press to switch the camera_mode,
and if the [ or ] buttons are pressed to switch scene cameras (cycling the index).
For camera movement, also in this function the code checks for different evt.type and orbit the camera, translate the camera, dolly the camera respectively.
Provide evidence that these interactions work. Possible evidence: a screen recording showing debug, user, and scene camera switching and interactive movement of the debug and user cameras.
Describe, in a few sentences,
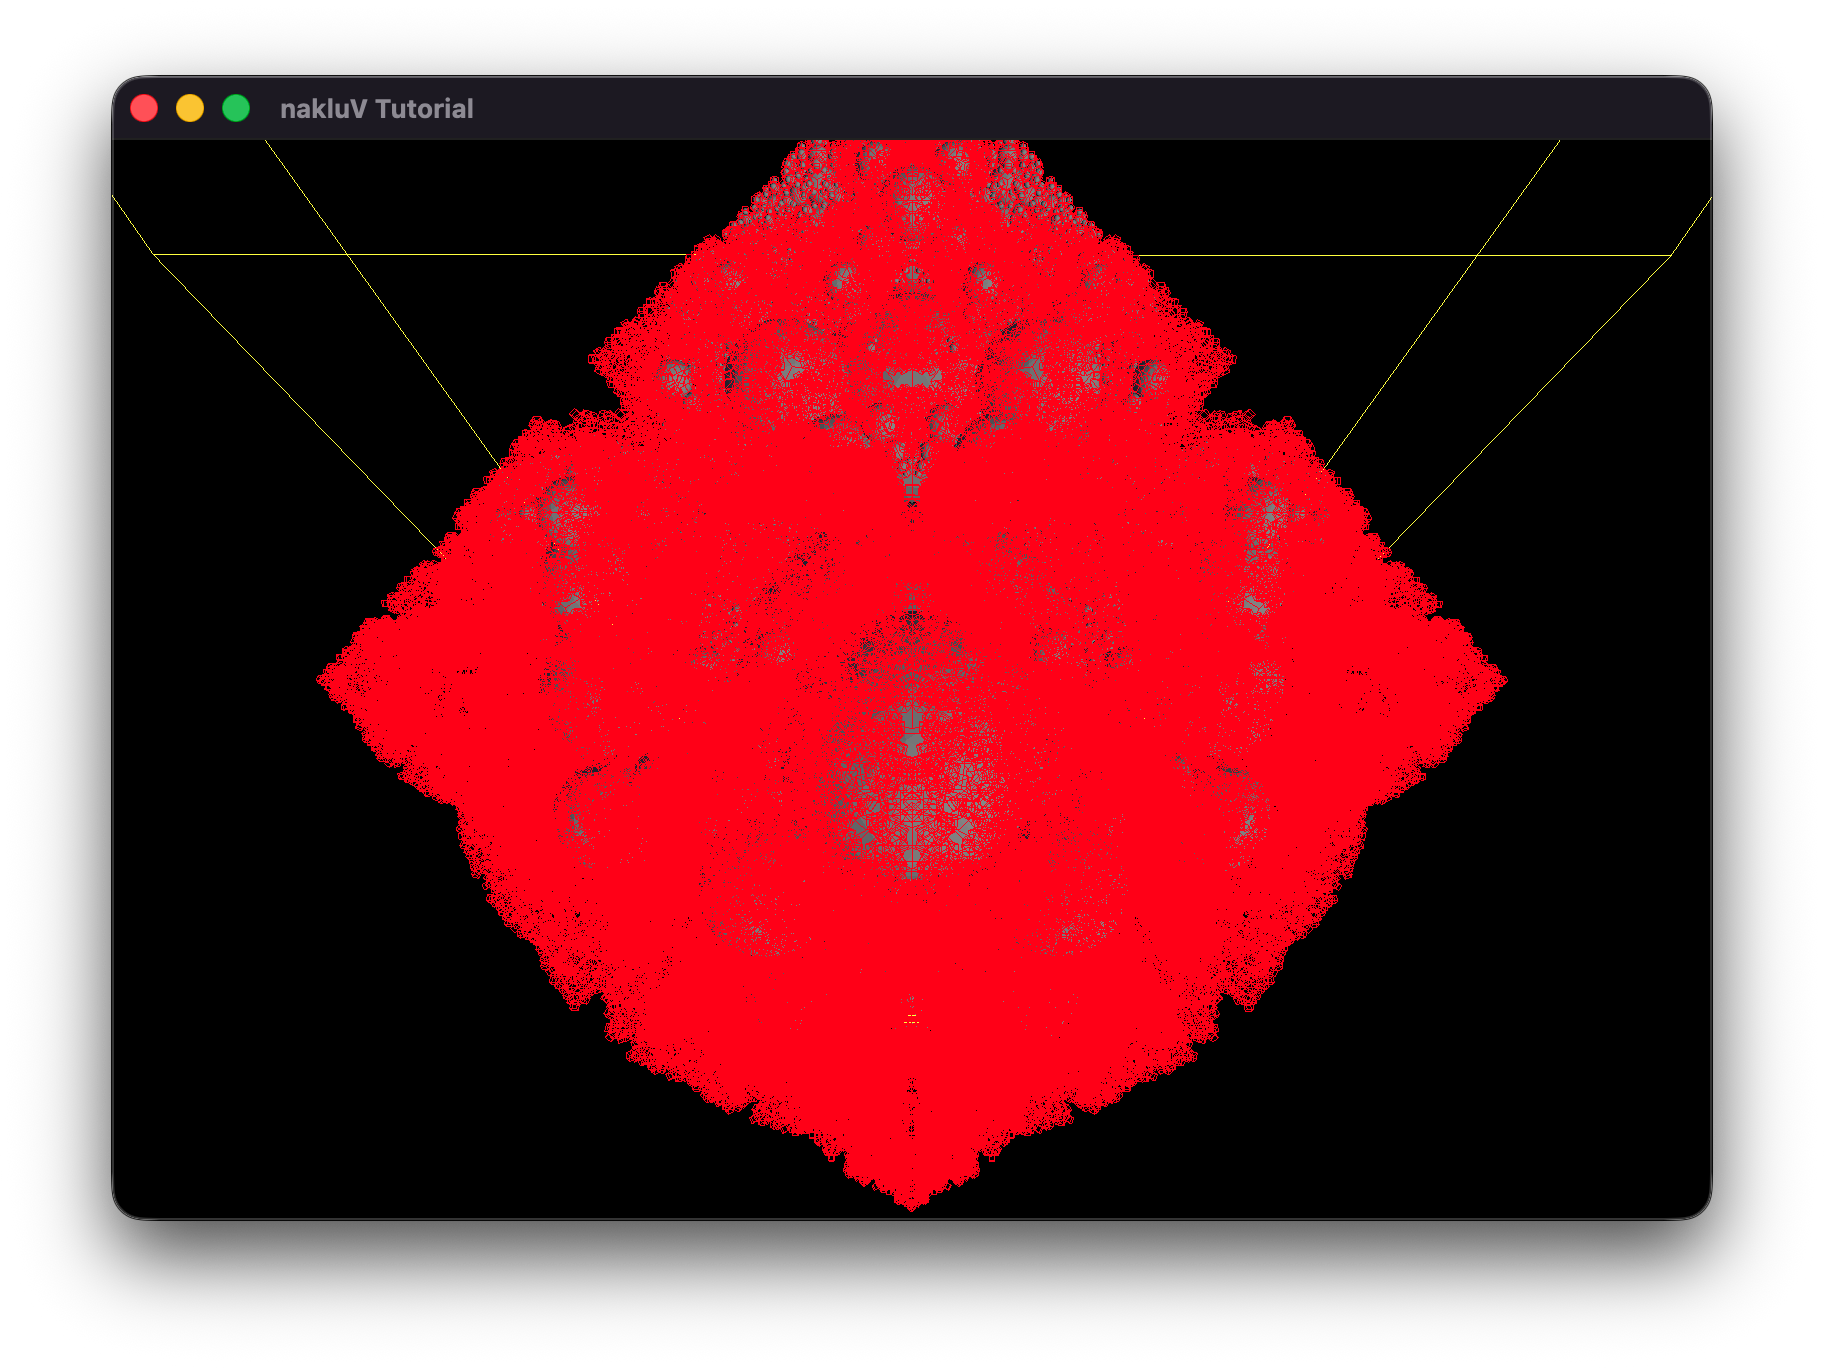
where your culling test is implemented;
how you computed bounding boxes and the camera frustum;
and the approach you used in your box-frustum test (draw and include a picture if it makes your explanation easier).
Include references to specific functions and structures in your code for us to examine further.
Each mesh instance stores the local space bounding box.
In Tutorial::render, I check if (culling_mode == CullingMode::Frustum) . In this case, for each object instance, I get its mesh bounding box and compute the frustum intersection test in aabb_intersects_frustum .
For each plane in clip space, it is transformed to mesh's local space to test if the mesh's bounding box is outside of the plane.
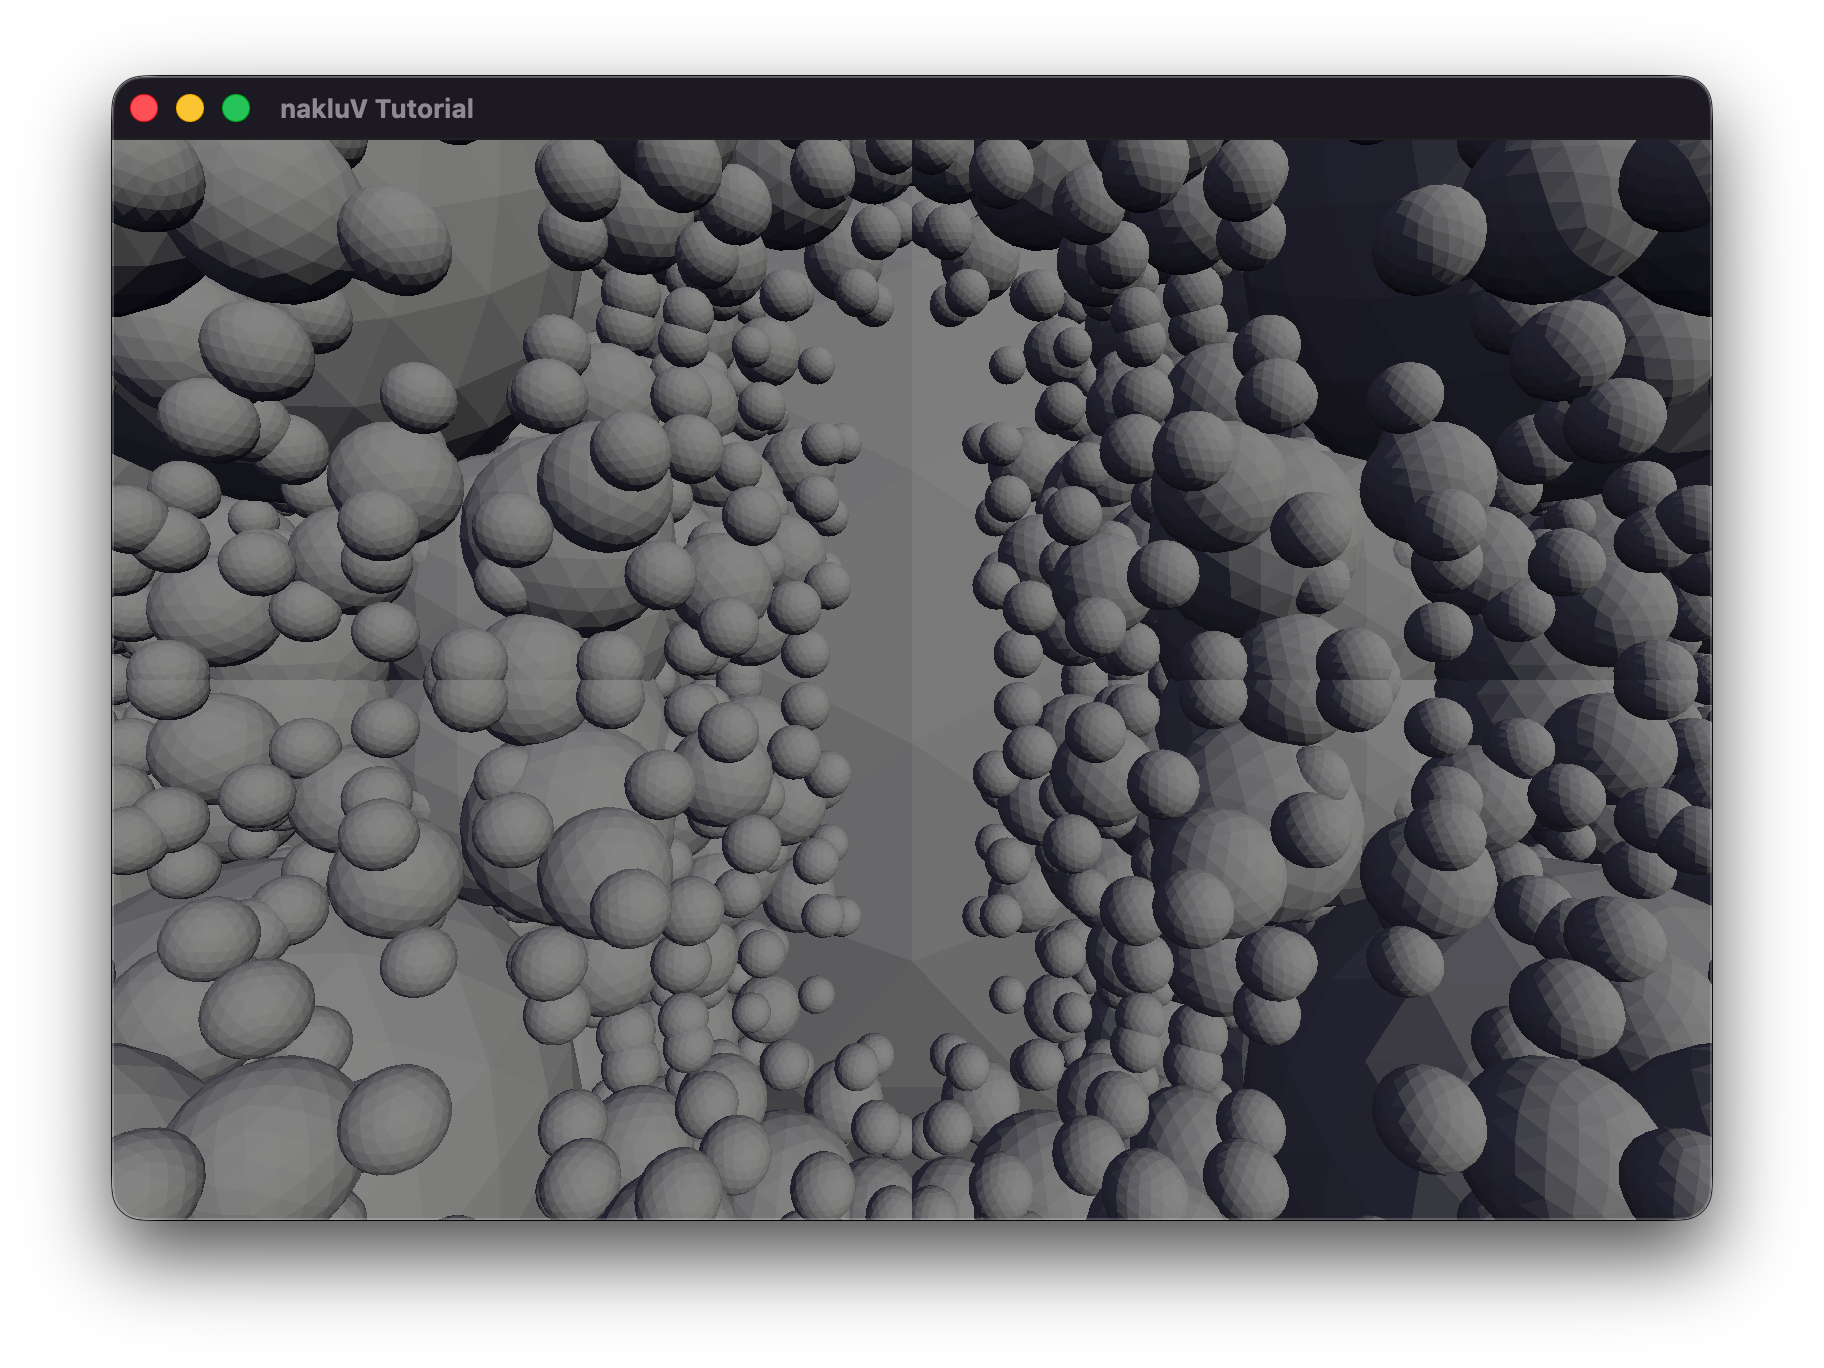
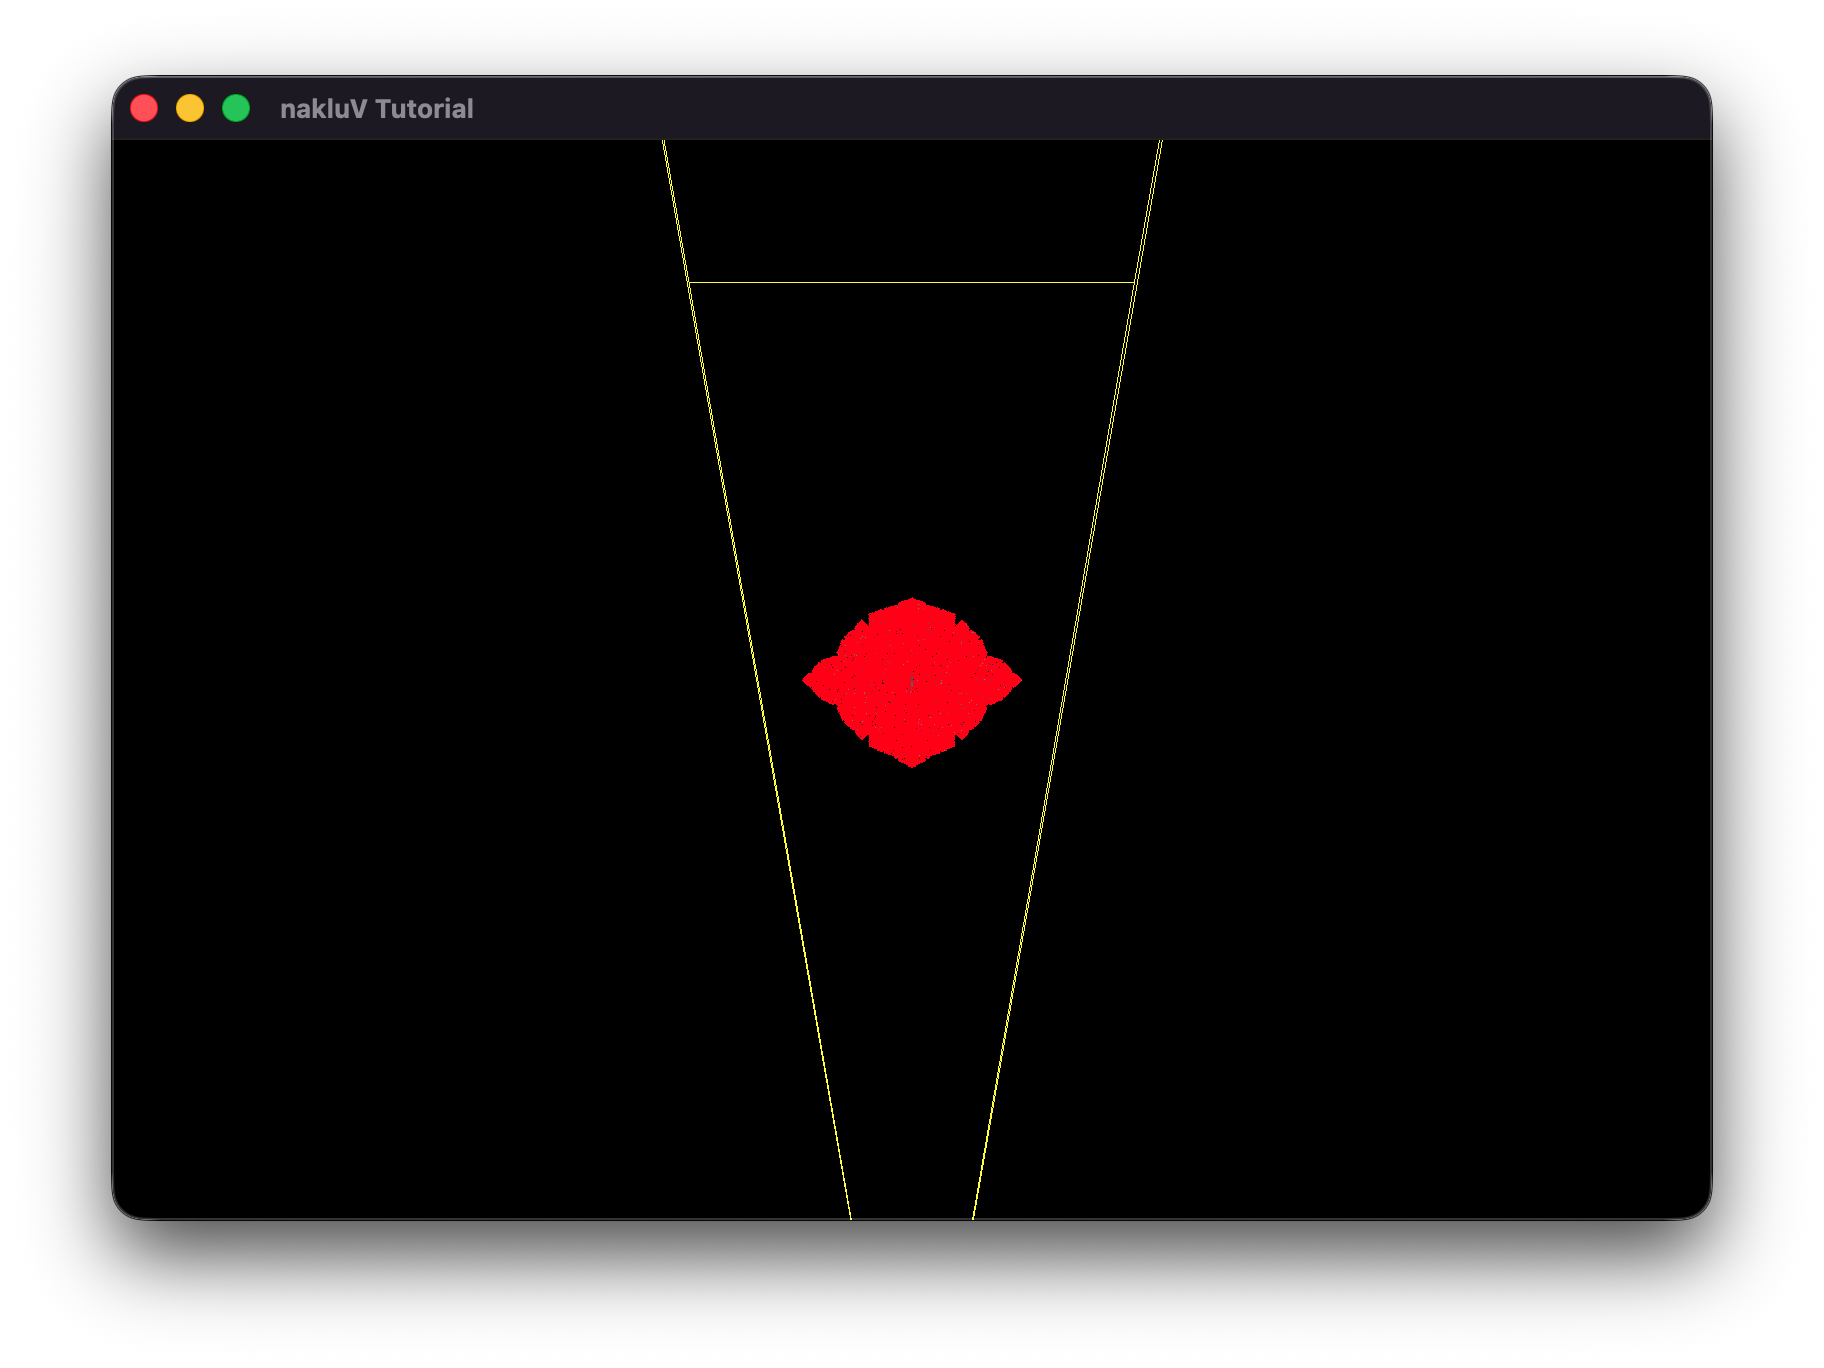
Include, as evidence, a screenshot or video showing that culling is working (e.g., by using a debug camera to show that meshes outside the user camera's view aren't being drawn).
Also include evidence that your culling works on any particularly difficult cases you may have thought up (include .s72 / .b72 files as appropriate).
Demonstrate a scene and camera angle where your culling code improves performance; and demonstrate one where it does not improve performance.
Include screen shots and make a chart or graph of median frame times as evidence for the performance impact.
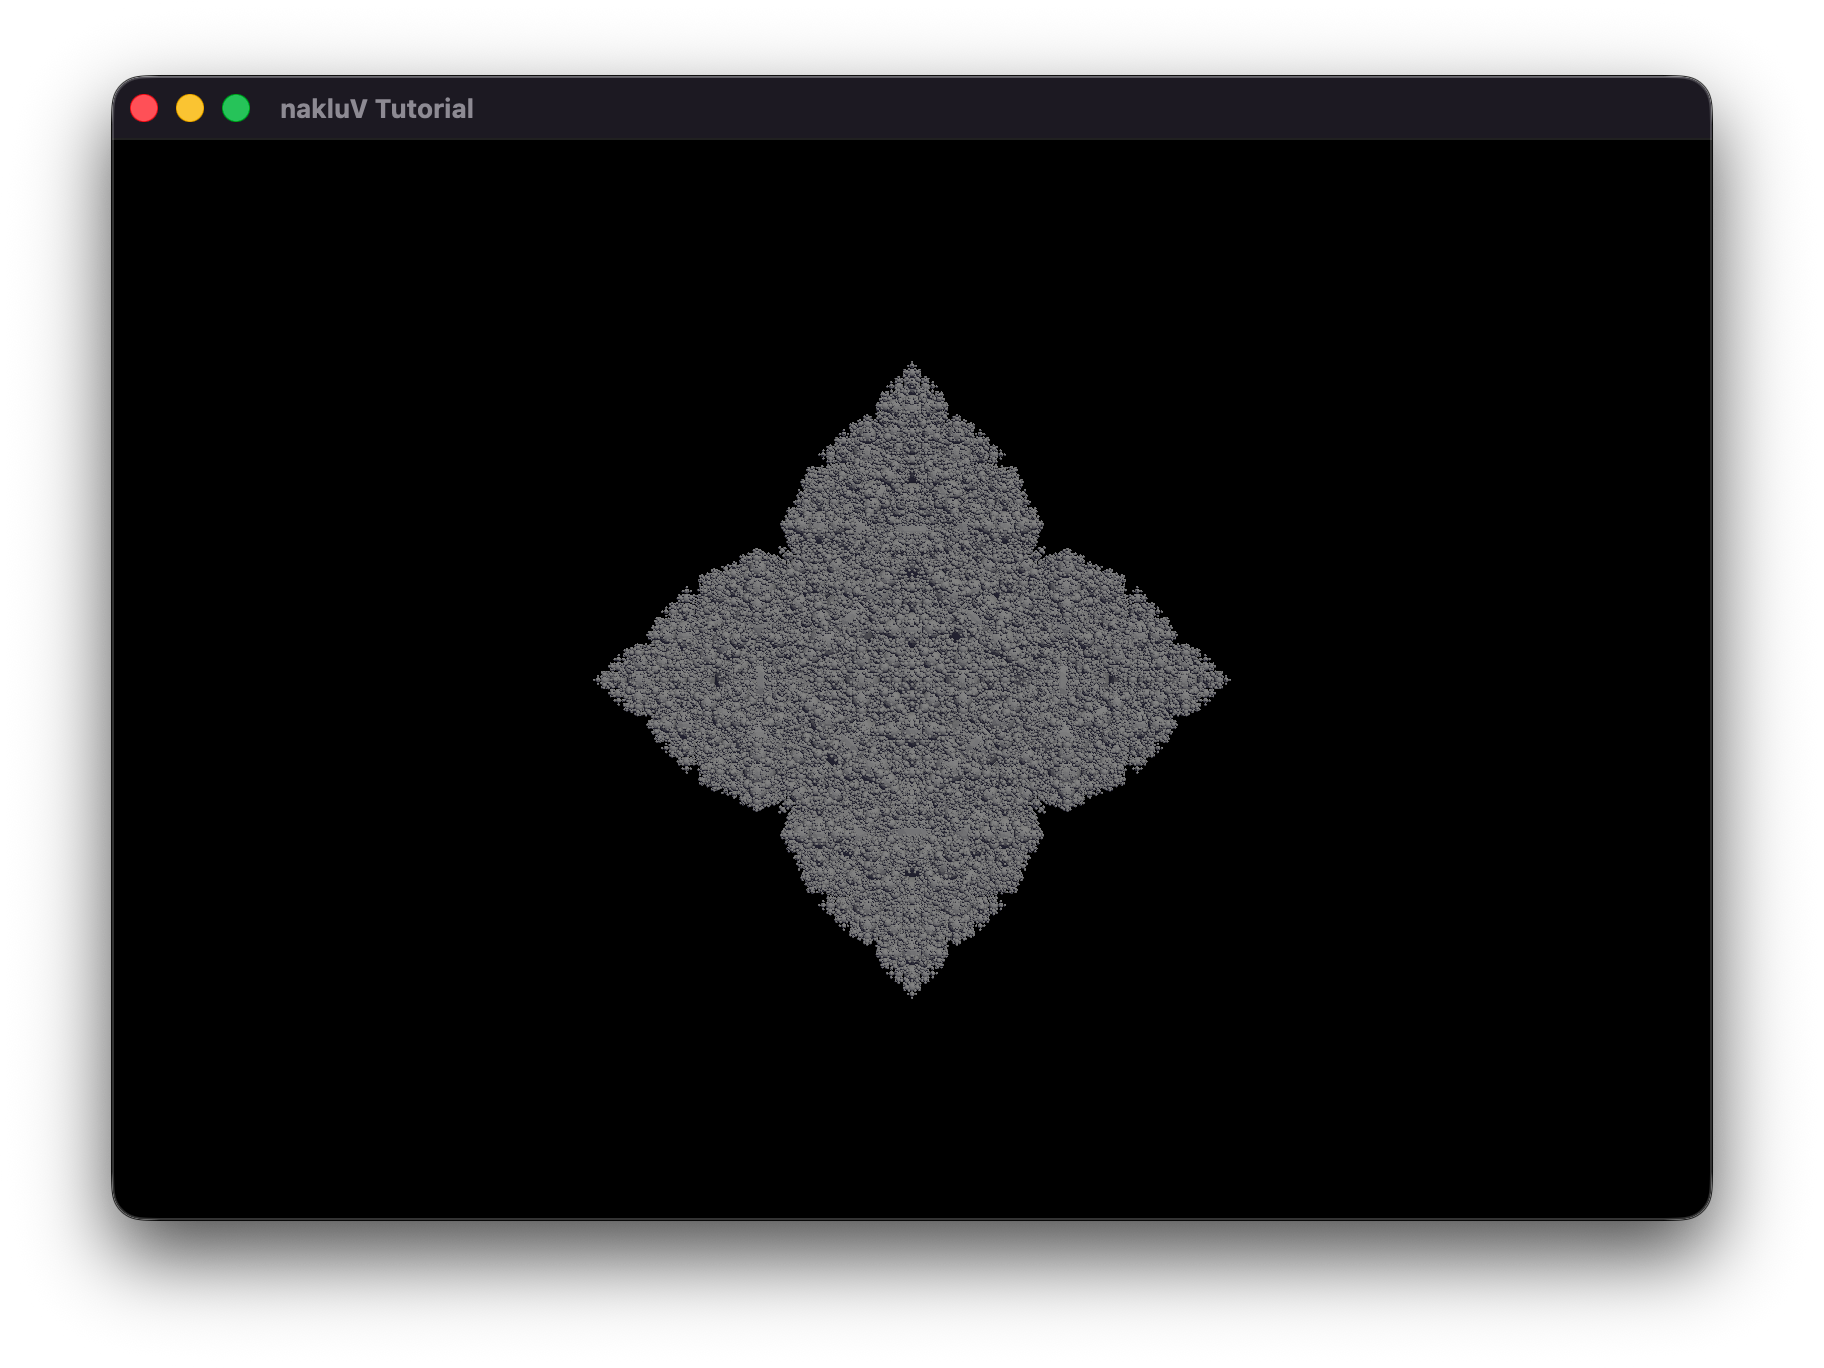
In sphereflake.s72, where the free camera is set to default position, enable culling will have nearly half of the meshes culled, and the frame time for gpu to draw is reduced by nearly half.
In sphereflake-fixedcamera.s72, where the scene camera is set to "Fixed-Camera", enable culling won't have any of the meshed culled, because the camera frustum includes all the meshes.
Both the two scenes used static sun and sky data, because the .s72 files do not contains Light objects.
Describe, in a few sentences:
how your viewer stores keyframes;
and where/how your code handles updated transformations due to animations.
Include code and structure references.
My viewer stores keyframes directly in the parsed S72::Driver objects.
When drivers exist, the program calls Tutorial::apply_drivers, which first restores all nodes to their cached rest pose (all_nodes, rest_T, rest_R, rest_S),
then evaluates each driver at time t and writes the result into d.node.translation/scale/rotation.
After node TRS values are updated, Tutorial::update_scene_objects() traverses the scene graph to recompute each instance's world transform.
Provide evidence that your viewer can play back s72 animation. Make sure to demonstrate that both camera and object animation work, and that animation of scene graph hierarchies work.
Describe for your CPU- and GPU-bottlenecked scenes what your approach was to moving the critical part of the workload to the CPU or GPU, respectively.
Include a screenshot of the scenes as well as s72 and b72 files as needed.
To create a CPU-bottlenecked scenario, I increased the number of objects that must be processed by the CPU during frustum culling by adding a large number of culled instances to the scene.
This shifts the dominant workload to the CPU, as it must evaluate many bounding volumes even though most are not rendered.
To create a GPU-bottlenecked scenario, I increased the rendering resolution significantly (from 4K to 8K to 16K), which raises the rasterization and fragment shading cost without changing scene complexity.
This moves the critical workload to the GPU, where the large number of pixels dominates frame time.
The cpu-bottleneck scene uses cpu-bottleneck.s72 and sg-Articulation.Rounded-Cube.pnTt.b72.
The gpu-bottleneck sceneuses sg-Articulation.s72 and related .b72 files.

Describe how you generated the scenes.
For cpu-bottleneck.s72, I just keep only one cube mesh in the .s72 file and add meshes that are outside the frustum in my code.
Describe how you tested the scenes -- including any relevant hardware information about the computer(s) you tested on.
Hardware: Apple M3 Max Chip
For the cpu-bottleneck scene, I adjusted the parameter of culled mesh to 1000, 10000, 100000, and 1000000.
For the gpu-bottleneck scene, I adjusted the parameter of resolution to 4K, 8K, and 16K.
Provide evidence that in each scene the CPU- or GPU-part of the workload is, indeed, a bottleneck. Use charts and graphs as appropriate to make your argument.
Write a subsection (<h4>) of this section for every attempted performance improvement. If you attempted no further performance improvements leave this section blank.
In each subsection, include a description of what you tried (including references to your code) and evidence of where (and if) the optimization actually did improve performance. Report -- at a minimum -- frame times for the same scene collected in headless mode with the optimization on and off. Ideally, develop a scene for which the optimization does improve performance and another scene for which it does not.
I implemented a Bounding Volume Hierarchy (BVH) to speed up frustum culling by grouping static mesh instances into a tree of world-space bounding boxes.
The BVH built function Tutorial::build_bvh_for_static() is called in Tutorial::build_scene_objects().
In Tutorial::render, culling is performed by Tutorial::cull_with_bvh, which traverses the tree top-down.
At the leaves, individual objects are tested using the existing Tutorial::aabb_intersects_frustum before being added to draw_list.
For animated objects, they are traversed linearly by Tutorial::aabb_intersects_frustum for frustum test.
This is the end of the structured report. Feel free to add feedback about A1 to this section.